Project 2 : Interdisciplinary Skin
For this step, I swapped the model with Mitchell Harris (study architecture ), the object that Harris choose is part of umbrella surface, which include the curve shape and the framework of the umbrella. At first i thought this object is not that difficult to do the metal sheet work. After I discussed with Harris, he told me that the surface of two side is quite hard to do, because when you tap on one side, the other side will flip over and its hard to match the sheet metal on the wood structure template.
1. Understanding the object you choose.
This is the object which Harris chosen. (The surface of the umbrella )

This is the framework of the umbrella. As it shown in the picture below.

2. Start shaping the sheet metal.
First you need to measure the size of the template.

Draw it on the sheet metal, to make sure the size is correct.

After drew the surrounding shape of the template,
check the line you draw again.

Cut the sheet metal, following the line. Remember to keep extra part when you cut it, because when you tap the metal it might extend, so if you keep some space around the actual shape, it might easier for you to cut the extra part or even fix it.

After you cut the sheet metal. The shape will look like the picture below, and make sure the edge of the sheet metal is flat, you can use the hammer to tap the sharp edge to make it flat.

Find a sand bag and a hammer with small round shape, to start tapping the middle ridge of the shape of the umbrella framework in opposite surface.

Then find the curve tool with round edge, put the sheet metal on it.

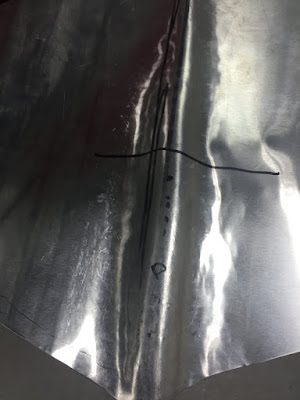
Draw the area with black line, so that you can easily see the part you wanted to tap on.

Put the ridge on the curve tool and start tapping the two side of the ditch with big round hammer.
Remember to put the sheet metal on the template to check if the metal is fit on the template well.

Use the wheel with bigger surface to roll the side of the sheet metal, to make subtle bends toward the rear of skin and make it smooth.

Because the framework of the umbrella is an arch, so it is defiantly different height. Draw the apex point of the umbrella and the arch area with pen. Then start to tap the area to build the arch shape.
The very important step is to check the sheet metal again and again to make sure the shape is fit in the template. So that you can clearly know which part is not fit on the template.

Do the arch again with the flat hammer, to make the surface more smooth.
For this step, you may found out that it is quite difficult to build the arch, because when you tap the metal on the middle part, two side of the metal will stick up and change the shape. So try to tap the arch part lightly.

Put the sheet metal again to check the shape fits on the template.

Tap down the end of the arch to match the template. And tap the edge with flat hammer to make the surface smooth as much as you can.

The apex part is the ridge of the framework of umbrella. After you finish this part, you can start to tap the side part.

Again, put the sheet metal on template to check the shape.

The shape of the side part, is curve but has different arc, so you have to
bend in a downward and upward direction.

Put the sheet metal of the template and tap it lightly to make it more fit in the shape.

When tapping the sheet metal it might flip up so you have to tap the metal with round hammer on the sand bag again and again. ( This is the most difficult part of the process.)

Tap on the template lightly.

In process, I repeat these steps several times. Do the curve surface again. Follow the step before and make sure the sheet metal fit the template.


As this step, You can see the sheet metal is almost fit in the template. But the surface of the sheet metal is full of groove, which is because I use the round hammer to tap the shape.

In order to fix the problem of the surface, try use the flat hammer to tap the surface lightly. To make the skin beautiful and smooth.


Put the sheet metal on template. Make sure it fits on.

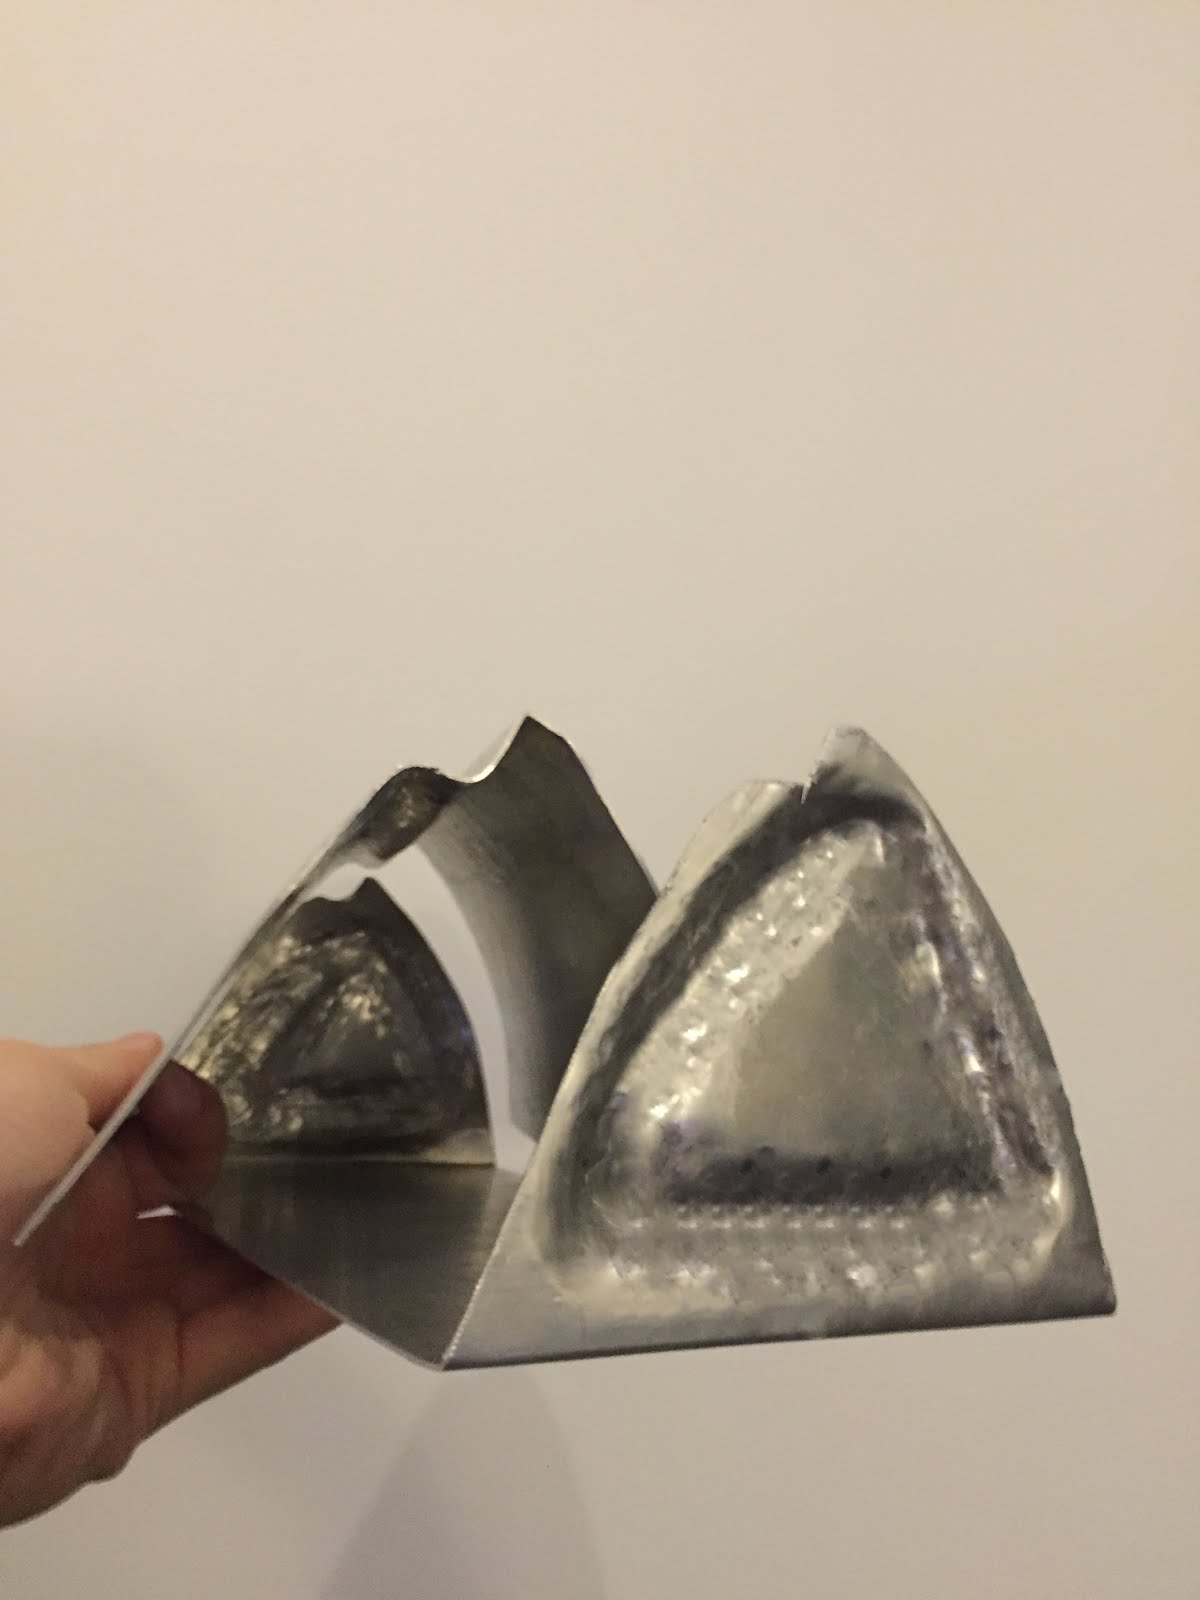
Final skin metal sheet
Top view of the final sheet metal.

Down view of the sheet metal.

Side view of the sheet metal.


Compare to the template.

The surface of part of the umbrella. Finished with sheet metal.


Reflection
After finish doing the umbrella shape of the project, I found out that this is quite different between my last sheet metal work (the speaker). For this object, you have to learn the skills of making curves and ridge in different ways. By using different shape of hammers. The most difficult part is to balance the side of the metal, at first I tapped the metal too hard, so it always flip up to the other side, in these experience now I know that I have to tap the metal lightly and tap on the right point that will make your work easily. And also I didn't know how to make the ridge to match the template, so it always goes to wrong direction, after asking Peter and Russel, I learned to draw the apex point first then tap the part which you want it goes down to fit in the template, that makes the work easier. And the last thing is to make the skin smooth, by using the hammer, tap the metal on the tools which has flat surface to make your work more beautiful. It is a good process to learn how to use hammer and how to tap the metal in the right point to extend the metal to fit in the template.